Tuesday, 12 January 2016

TUSCAN BEAN SOUP, Kind Of Like Ribollita.


This is such a flavorful soup!  Love it! Two tricks involved: use dried beans, the ones that need to be soaked overnight, and also use a nice dose of vegetable broth or a combination of chicken and vegetable broth if you like to have chicken broth (canned beans? Who's kidding, they'll do in a pinch)!
This soup is very similar to ribollita soup. I have left the bread out because I try not to eat too much bread these days. It's just as good without it. In fact, it's so good that I can eat it cold, or I can even eat it for breakfast! Okay ... as the trend goes, this is the part of the blog where I regale you with some cute personal incidents from my adventurous life. Stillness ... Can't think of any. Some other time perhaps. Not disappointed, I know you are not disappointed! 


Ingredients: 

1 pound dried cannellini beans
6 tablespoons extra virgin olive oil
2 onions, sliced
1 shallot sliced
1 (15-ounce/500 gram) can whole tomatoes
1 leek, cleaned well and chopped
3 medium carrots, chopped
3 stalks celery, chopped
½ bunch parsley, chopped
1 bunch Swiss chard, chopped
1 bunch kale, chopped
¼ Savoy cabbage, chopped
2 teaspoons dried oregano
the leaves from 1 sprig of rosemary, chopped
1 bay leaf
Salt and pepper to taste
8 cups vegetable broth
6 cups water
For topping:
grated Pecorino cheese
extra virgin olive oil

Directions:

Soak the beans overnight.
In a large heavy pot heat 4 tablespoons of the olive oil and sauté the sliced onions and shallots until they have caramelised. While sautéing, season the onions with some of the oregano.
Mash the tomatoes and add them to the pot. Add the juice the tomatoes were packed in, and also add two cups of the water.
One by one add all the vegetables, stirring to mix after each addition.
Add the herbs and the rest of the olive oil.
Allow the mixture to cook for about fifteen minutes, stirring occasionally.
Meanwhile, puree nearly half of the beans and add them to the vegetables.
Add the rest of the beans.
Add the broth and the remaining water. Mix well and bring to a boil.
Lower the heat to a slow simmer and cover the pot. Allow the beans to cook for two hours, stirring occasionally.
Ladle into bowls and top with the grated cheese and a drizzle of olive oil.
Store leftover soup in the refrigerator for about 3 days or in the freezer for one to two months. 


Monday, 4 January 2016

VASILOPITA WITH BRANDY AND CITRUS FLAVOURS


She's looking good, isn't she? Very easy to make.
Lovely brandy and citrus flavours. This is a vasilopita made with baking powder instead of yeast. Its texture is that of a dense cake, which is characteristic of a vasilopita. The celebratory Greek New Year's cakes have a more substantial, doughy texture than the average cake. 

By now you may have noticed the Santa decoration. You might ask why he's still hanging around. Doesn't Santa take a much-needed vacation after Christmas Day? No, not really. He still has the Greek New Year's Eve to contend with: that's when Santa visits Greek households. 

You might ask why so? I'll tell you: Saint Basil and Santa are one and the same in Greek tradition. Saint Basil's feast day is on January first, therefore, Saint Greek Santa (Agios Vasilios), puts in his appearance directly after the arrival of the New Year. Oh, then there's the coin. There is a coin involved. It's hidden inside every vasilopita. You might ask why so? I'll tell you: Saint Basil was a generous individual, a philanthropist, so the coin commemorates that fact. 

The actual practice of hiding a small trinket inside a cake, a surprise meant for a lucky recipient, dates back to pagan times. The practice was very popular and rather than eradicate it, the early Christian church incorporated it into its own rituals. It's a fun practice that survives to this day. 

I wrapped a shiny penny in aluminium foil and dropped it in the dough right before baking. A penny I thought, not the usual quarter. To me, a penny is symbolic of much more than a quarter dollar can ever be. Problem was, the penny being small, people had trouble finding it. "Did you forget?" they asked me several times. I was entitled to two slices, one for myself, and another for an absent friend. I took them apart; who wants to eat vasilopita when the coin can't be found? I turned those slices into crumbles ... but cake crumbles are just as nice to eat as regular cake.

Everyone else also smashed their slice into tiny pieces. "Is it that important?" my nephew Alex asked. This from the kid who a few years ago used to storm upstairs and hide in his room if he couldn't claim the coin as his. "Yes, Alex, it's important, it's very important." 

The next day at breakfast, Alex finished eating his slice, and there was the penny, he found it and claimed it. "Somewhere in the middle of the piece," my brother said when he called. I had asked him for the coordinates. 

Below is the recipe. Decorate the cake as you wish, perhaps use a dollar coin, it's larger, or you may want to use a penny, much more fun! As you probably know, the alcohol in the brandy gets burned off during baking, and only the flavour of the brandy gets left behind. For those of us either permanently or temporarily on the wagon, that's a plus!


Ingredients:

All ingredients should be at room temperature. Remember that beating egg whites into a meringue requires a bowl and a whisk that are free of oils. Make sure no yolk has accidentally fallen into the egg whites.

4  cups all-purpose flour
1/2 cup almond flour
4 teaspoons baking powder
1 teaspoon baking soda
Grated zest of 1 orange

Grated zest of 1 lemon


5 eggs, separated
1 egg left whole, do not separate
a pinch of cream of tartar
1 cup of sugar (can use an additional 1/4 cup for extra sweetness)
12 tablespoons unsalted butter, very soft, almost melted
1  1/2 cups freshly squeezed orange juice
one or two tablespoons brandy (optional)
1 vanilla bean 

Directions:
  • Preheat the oven to 350° F/160° C.
  • Grease well and flour a 12-inch/30-cm, round cake pan. 
  • In a bowl, whisk together the flour, the baking powder, and the baking soda. Set aside.
  • In the large bowl of your mixer, on high speed and using the whisk attachment, beat the egg whites and the cream of tartar until stiff peaks are achieved. You want a nice, thick meringue. When ready, remove it to another bowl and set it aside. 
  • Clean your mixer bowl.
  • Add the yolks to the bowl. Beat with the whisk attachment until the yolks are creamy. 
  • Scrape the vanilla bean and add the vanilla to the sugar. Mix it in well. 
  • Add the sugar and beat until creamy and pale in colour.
  • Add the one whole egg and beat.
  • Add the butter and beat until incorporated. 
  • Add the orange juice, the orange zest, the lemon zest, and the brandy if using. Beat until incorporated.
  • Slowly add the reserved flour mixture to the yolk mixture. 
  • Halfway through, switch to mixing by spatula and mix only until incorporated. 
  • Fold in the reserved egg whites. 
  • Pour the batter into the prepared pan and smooth the top with an offset spatula. 
  • Bake the cake for about 1 hour, or until a toothpick inserted into the centre comes out clean. 
  • Cool on a wire rack before removing from the pan. 
  • Decorate as you like: let your inner artist take command!

Season's Greetings Everyone!!!
Happy New Year!!!!

Monday, 2 February 2015

HAPPY BIRTHDAY LANGSTON HUGHES! Let's have some cinnamon mocha coffee to celebrate!


It's wonderful to participate in Cook the Books once again! For this round, we read "Sustenance and Desire, A Food Lover's Anthology of Sensuality and Humor"  


Chosen for us by Rachel, from the Crispy Cook, the book is edited by Anne Bascove, who goes by the mononym of Bascove, and Bascove also supplied the paintings appearing in the book because after all, she is an artist/illustrator. Have a look:

Still Life with Heirloom Tomatoes, 2003, oil on canvas (Bascove)

Still Life with Melon, 2003, oil on canvas (Bascove)
Paris, 2003, oil on canvas (Bascove)
The anthology is divided into four sections: nourishment, desire, hunger, and sustenance. Bascove chose wonderful pieces of prose and lots of good poetry!  Some of the authors represented are Virginia Woolf, Emily Dickinson, Wislawa Szymborska, Czeslaw Milosz, Marcel Proust, Allen Ginsberg, May Sarton... should I go on? Get the picture? A superb compilation, in a book that should stay on your shelf and be available to frolic with every so often.
  
Langston Hughes, Collection of the Smithsonian National Museum of African American History and Culture.


For my entry, I decided to focus on a poem by Langston Hughes. Not only is it a beautiful poem, but just yesterday, February 1st, was the commemoration of the author's birthday, therefore it seemed very appropriate that I say thank you, Mr Hughes, your poetry has made a difference in our lives and in our culture. The poem is called Harlem Sweeties, and on the Internet, it can be read here.

                   ... All through the spectrum
                   Harlem girls vary—
                   So if you want to know beauty’s
                   Rainbow-sweet thrill,
                   Stroll down luscious,
                   Delicious, fine Sugar Hill.

I was inspired by the poem to make a uniquely flavoured drink: 
Cinnamon Mocha Coffee!


Cinnamon Mocha Coffee contains honey, cinnamon, there is coffee for the most part because it is, after all, a type of coffee drink, there is cocoa also, and a few cloves are thrown into the mix.
All these earthy flavours are in keeping with Hughes' theme, which is that there is an untold and uncounted variety of hues in the integumentary aspects of Harlem Sweeties, and that there is lusciousness in the skin colour of people of colour. Hughes is offering a hymn of praise to African Americans, and by extension to all people who show their courage by embracing difference. Thank you, Langston Hughes, and Happy Birthday!  


Here's the recipe for Cinnamon Mocha Coffee, based on one from Taste of Home magazine:

Ingredients:

1/3 cup ground coffee
3/4 teaspoon ground cinnamon
1 cup milk
2 tablespoon honey
2 tablespoons baking cocoa
1 teaspoon vanilla extract
a few cloves
4 cinnamon sticks

Directions:
  • In a coffeemaker basket, combine the coffee and the cinnamon. Prepare four cups of brewed coffee according to the manufacturer's directions.  
  • Meanwhile, combine milk, sugar, cocoa, cloves and vanilla in a saucepan. Cook over low heat for about seven minutes, stirring occasionally. 
  • Strain the hot milk mixture into four coffee cups, then add the cinnamon-flavoured coffee. Garnish with cinnamon sticks. 
Easy to prepare, a warm drink with a beautiful colour!

drops of honey and sticks of cinnamon, a dusting of cocoa, a sprinkling of cloves

Friday, 15 August 2014

MEATLESS CHUNKY, CHEESY TOMATO SAUCE


Ingredients:

3 tablespoons olive oil
1 onion, chopped well
2 garlic cloves, minced
2 ribs of celery, chopped well
1 sweet Italian frying pepper, chopped, seeds removed 
2 teaspoons tomato paste
1 (15-ounce) cans tomato sauce
1 cup water
7 fresh tomatoes, peeled, seeds removed, chopped 
or 1 can (28-ounces) whole tomatoes 
2 teaspoons dried oregano
a few sprigs of fresh thyme, a few basil leaves and a little parsley
salt and pepper to taste
1/2 cup grated Pecorino Romano cheese


Directions:
  • In a saucepan, heat the olive oil and add the onions, celery, pepper and garlic. Sauté until soft. 
  • Stir in the tomato paste and cook for 1 minute.
  •  Add the tomato sauce and water and stir to deglaze the pan.
  •  Add the oregano and thyme. 
  • Add the tomatoes. 
  • Mix, season with salt and pepper to taste, bring to a boil and reduce the heat to low. Cover and let simmer. 
  • After half an hour check the sauce. It should be pretty thick.  At this point add the grated cheese, stir well and cook for another 15 minutes. 
  • Chiffonade the basil leaves and mix them into the sauce. Turn off the heat. 
  • The tomato sauce will be thick, sweet and fragrant: use it up!

Tuesday, 17 June 2014

ROMAINE LETTUCE AND FENNEL SALAD: A GREEK SPRING GREENS SALAD


A very nice salad, light, refreshing, simple and quick to make but with lots of flavour. It's a popular late spring-early summer salad at the Greek table. That's the time of year when the ingredients in it can be found at their best and freshest in the garden.  Of course, if your vegetable garden is at the supermarket, as is mine, you can enjoy this salad anytime. Try it in the summer though, because it makes really refreshing hot weather fare.  Here's how it's made:

Ingredients: 

3 romaine lettuce hearts, thinly sliced
1/2 cup fresh dill, finely chopped
1/2 of a fennel bulb, thinly sliced
1/4 cup fresh mint, finely chopped
5 scallions chopped, use white and light green parts 
about 5 tablespoons extra virgin olive oil
juice of one lemon
salt and pepper to taste
2-3 tablespoons grated Pecorino Romano cheese

Here's a picture of the salad right before adding lettuce and dressing. 


Directions: 

Mix the fennel, dill, mint, and scallions.  


Add the lettuce and mix to combine. 

Season with salt and pepper. 

Toss with the oil and lemon juice, then sprinkle the grated cheese on top.  

Easy!


Saturday, 2 November 2013

PIZZA DOUGH, GREEK STYLE: Pizza Shop Pizza Dough!


Wish I had one slice left. Even half a slice. I would settle for half of a slice. Unfortunately, it's all gone and I am left only with pictures and memories. Ah, the taste memories! I am eulogizing this pizza because it's not store bought, I made it myself. Made the dough, arranged the toppings, even used zucchini from my garden, and handpicked the basil leaves from the plant that grows on my patio. So I had special feelings about this pizza.  We had a relationship. It's over now. The pizza has been eaten. 


What can I say? I'm Greek and Greeks love bread! I would wager it's every Greek's favourite thing to eat. So just about any Greek who cooks knows how to bake bread with homemade dough. And they all like to argue about whose dough is the best. 


Now we come to the subject of pizza. Can you have pizza without dough? Perhaps in an alternate universe, it could be possible ... but hardly worth the experience. Since pizza depends on dough to become pizza, the pizza with the best dough makes the best pizza. Perfect the art of making dough, and you will have perfected the art of making pizza! 

Another important thing in pizza making is to have a flavourful sauce. Not a bland unseasoned sauce, nor a strong over-seasoned one, not a runny sauce, and not an extra thick and heavy sauce. Pretend you are a politician who has to tread in the middle of the political spectrum, then make your pizza sauce accordingly. But you will not have created a middle of the road sauce, instead, you will have a balanced sauce!

I'll tell you how I make my pizza; the recipe is tied and true and it makes an amazing pizza! 


Ingredients:


4 cups bread flour
1½  cups very cold water 
¼ cup smooth extra virgin olive oil
1 teaspoon salt
2 teaspoons sugar
2 teaspoons instant yeast
a little more flour, cold water and oil

Directions:
  • In the bowl of an electric mixer add the water, salt, sugar, oil and yeast. Using the paddle attachment, mix until the ingredients are incorporated. 
  • Switch to the dough hook and add the flour in 8 batches (1/2 cup increments), mixing after each addition. Mix until the dough is smooth and clears the sides of the bowl. 
  • Be patient and let it mix, but if it looks as though it's going to stay a little too wet, sprinkle more flour into the bowl and mix until done. If the dough starts to wrap itself around the dough hook and looks as though it’s heading out of the bowl, add some water. You want a dough that is soft and just a little sticky.
  • Sprinkle flour on your work counter and place the dough on top. 
  • Line a sheet pan with parchment paper and lightly oil the parchment. 
  • Cut the dough into pieces and weigh it: 14 to 16 ounces/400+ grams are good for a large pizza that will serve about 4 people, and 8 to 10 ounces/230+ grams are good for a smaller one that will serve about 2 people. 

  • Form each piece of dough into a round and place it on the sheet pan. 
  • Cover the dough with flour and then cover the pan it's on with a plastic bag. Make sure it's well covered.  
  • Place the pan in the refrigerator. It should stay there to rest overnight. 
  • Any dough that will not be used the next day can be individually wrapped in plastic, placed in a freezer bag and frozen. It can be kept in the freezer for 2 to 3 months.

To make a pizza:


  • Place a dough ball on the counter. If frozen, let it come to room temperature. Cover it with flour and flatten it with the palm of your hand. Let it rest for 20 minutes and then flatten it to the appropriate size by using a rolling pin.


  • I don't like to bake my pizza directly on top of a pizza stone. I use a pizza pan, and I place the pan on the pizza stone. So at this point, I place the dough in its pan and I stretch it with floured hands until it has reached the sides of the pan. If the dough shrinks back from the sides, let it rest for a few minutes and it will become pliable and stay put and do what you want it to do.  
  • I use a pan with a 14-inch diameter for a large pizza and a pan with a 10-inch diameter for a small pizza.

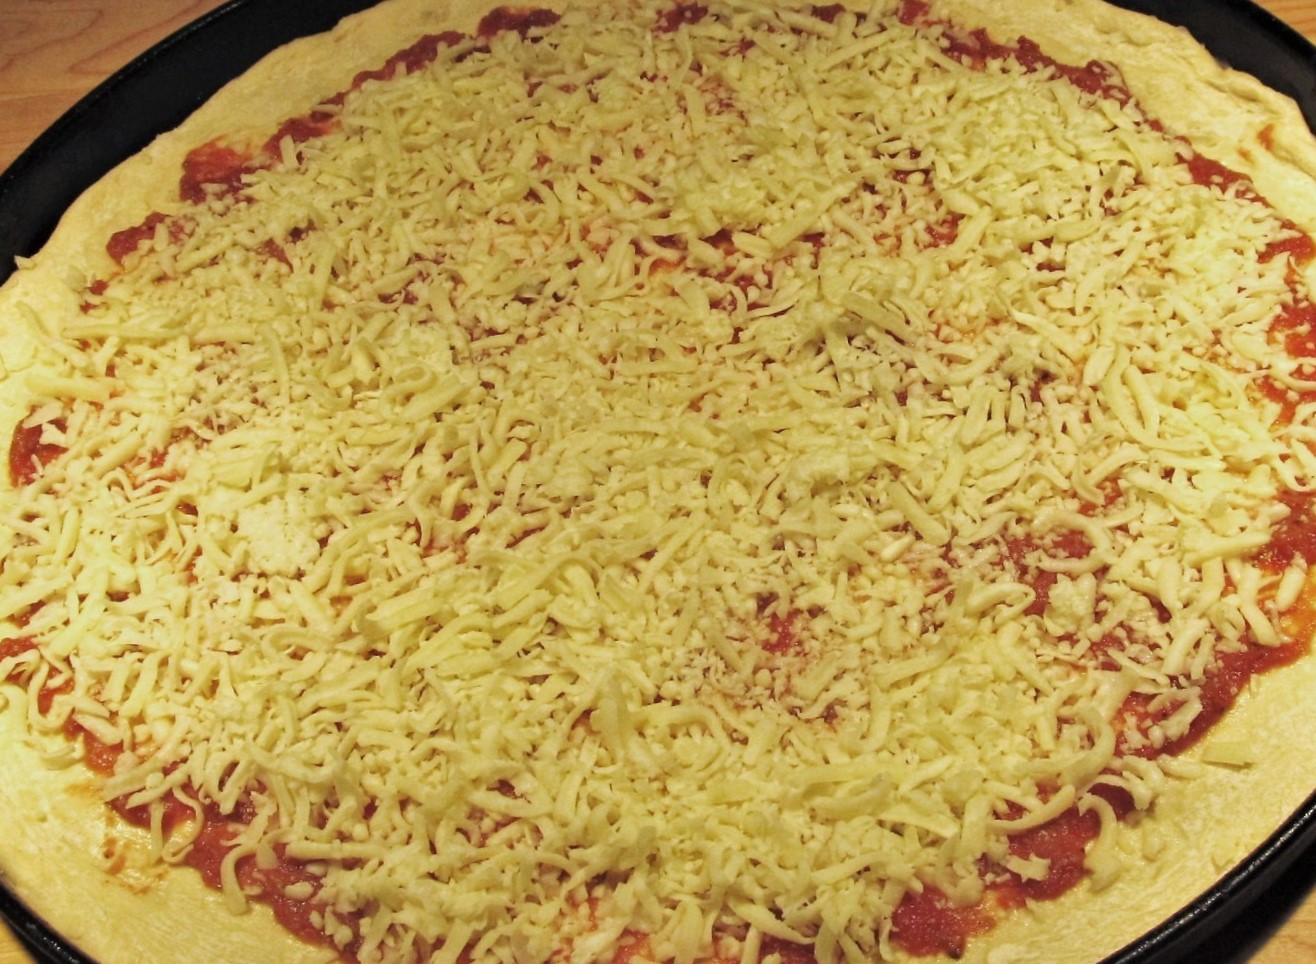
  • Once the dough is stretched out in the pan, it's time to spread on the sauce. Two tablespoons of sauce for the small pizza, or four tablespoons of sauce for the large one. After that, I sprinkle on the cheese.
The type of cheese I like to use is shredded mozzarella mixed with a good shredded cheddar. In my opinion, this combination tastes best and in addition, gets rid of the problem of dealing with an elastic cheese which is what mozzarella turns into when left to its own devices. I like a 60/40 blend: 60 percent mozzarella, 40 percent cheddar.
  • At this point, the dough has to rest again so that it can rise. Cover it with plastic and let it rise for about 2 hours. If the pizza will not be cooked after the 2 hours, it can wait in the refrigerator.
Zucchini and olive pizza! Use what you have on hand. I had all those vegetables in my refrigerator - no need for a trip to the grocery store. A nice touch was the fresh mozzarella on top and the sesame seeds around the border of the pizza. Actually, I hesitate to make pizza without that sesame seed border ... It's kind of my signature, I think. 

  • When ready to cook add any toppings that will be used. The oven should be preheated to 450ºF/230ºC. Place the pizza in the oven, on top of the pizza stone. Baking time will be approximately 8 minutes.
  • If the top cooks before the bottom, next time move the pizza stone to a lower shelf. If the bottom is nice and crisp before the cheese and toppings are browned, then next time the stone should be placed on a shelf that sits higher in the oven. 
  • Always check: before starting to bake the pizza make sure the oven is nice and hot. 
Ready!

  • Take the pizza out of the oven and with the use of a long knife or spatula transfer it to a cutting board. Don’t slice it yet. Inhale all the different aromas arising from it! You will smell the freshly baked dough, the melted cheese, the fragrance of roasted vegetables if any have been used. You will feel the heat rising up from the pizza, and the heat will spin all those fragrances around the room. Then look at all the lovely colours. Admire the golden dough, the redness of the sauce ... is it any wonder pizza is the world’s favourite food? Is there anyone who does not love pizza? 
  • Okay, now it’s time to stop admiring. Your pizza, she is ready to be eaten! It needed a few minutes of admiration so that its beauty could be thoroughly appreciated, but also so that the cheese could slightly set, becoming easier to slice. Well, what are you waiting for? Slice that baby and… you know what to do after it's sliced, don't you? Don't you?