Showing posts with label Dough. Show all posts

Saturday, 2 November 2013

PIZZA DOUGH, GREEK STYLE: Pizza Shop Pizza Dough!


Wish I had one slice left. Even half a slice. I would settle for half of a slice. Unfortunately, it's all gone and I am left only with pictures and memories. Ah, the taste memories! I am eulogizing this pizza because it's not store bought, I made it myself. Made the dough, arranged the toppings, even used zucchini from my garden, and handpicked the basil leaves from the plant that grows on my patio. So I had special feelings about this pizza.  We had a relationship. It's over now. The pizza has been eaten. 


What can I say? I'm Greek and Greeks love bread! I would wager it's every Greek's favourite thing to eat. So just about any Greek who cooks knows how to bake bread with homemade dough. And they all like to argue about whose dough is the best. 


Now we come to the subject of pizza. Can you have pizza without dough? Perhaps in an alternate universe, it could be possible ... but hardly worth the experience. Since pizza depends on dough to become pizza, the pizza with the best dough makes the best pizza. Perfect the art of making dough, and you will have perfected the art of making pizza! 

Another important thing in pizza making is to have a flavourful sauce. Not a bland unseasoned sauce, nor a strong over-seasoned one, not a runny sauce, and not an extra thick and heavy sauce. Pretend you are a politician who has to tread in the middle of the political spectrum, then make your pizza sauce accordingly. But you will not have created a middle of the road sauce, instead, you will have a balanced sauce!

I'll tell you how I make my pizza; the recipe is tied and true and it makes an amazing pizza! 


Ingredients:


4 cups bread flour
1½  cups very cold water 
¼ cup smooth extra virgin olive oil
1 teaspoon salt
2 teaspoons sugar
2 teaspoons instant yeast
a little more flour, cold water and oil

Directions:
  • In the bowl of an electric mixer add the water, salt, sugar, oil and yeast. Using the paddle attachment, mix until the ingredients are incorporated. 
  • Switch to the dough hook and add the flour in 8 batches (1/2 cup increments), mixing after each addition. Mix until the dough is smooth and clears the sides of the bowl. 
  • Be patient and let it mix, but if it looks as though it's going to stay a little too wet, sprinkle more flour into the bowl and mix until done. If the dough starts to wrap itself around the dough hook and looks as though it’s heading out of the bowl, add some water. You want a dough that is soft and just a little sticky.
  • Sprinkle flour on your work counter and place the dough on top. 
  • Line a sheet pan with parchment paper and lightly oil the parchment. 
  • Cut the dough into pieces and weigh it: 14 to 16 ounces/400+ grams are good for a large pizza that will serve about 4 people, and 8 to 10 ounces/230+ grams are good for a smaller one that will serve about 2 people. 

  • Form each piece of dough into a round and place it on the sheet pan. 
  • Cover the dough with flour and then cover the pan it's on with a plastic bag. Make sure it's well covered.  
  • Place the pan in the refrigerator. It should stay there to rest overnight. 
  • Any dough that will not be used the next day can be individually wrapped in plastic, placed in a freezer bag and frozen. It can be kept in the freezer for 2 to 3 months.

To make a pizza:


  • Place a dough ball on the counter. If frozen, let it come to room temperature. Cover it with flour and flatten it with the palm of your hand. Let it rest for 20 minutes and then flatten it to the appropriate size by using a rolling pin.


  • I don't like to bake my pizza directly on top of a pizza stone. I use a pizza pan, and I place the pan on the pizza stone. So at this point, I place the dough in its pan and I stretch it with floured hands until it has reached the sides of the pan. If the dough shrinks back from the sides, let it rest for a few minutes and it will become pliable and stay put and do what you want it to do.  
  • I use a pan with a 14-inch diameter for a large pizza and a pan with a 10-inch diameter for a small pizza.

  • Once the dough is stretched out in the pan, it's time to spread on the sauce. Two tablespoons of sauce for the small pizza, or four tablespoons of sauce for the large one. After that, I sprinkle on the cheese.
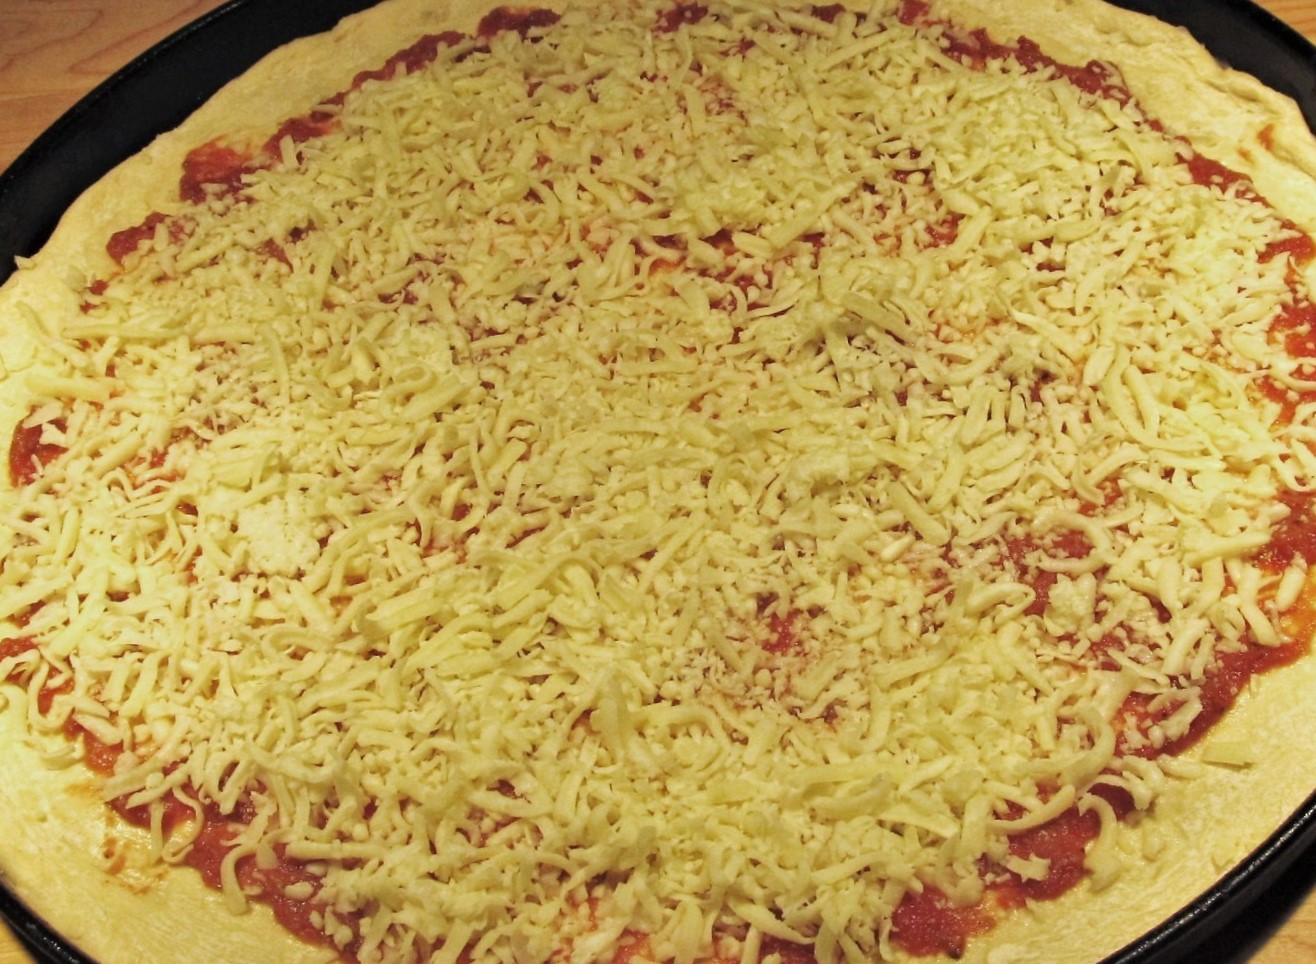
The type of cheese I like to use is shredded mozzarella mixed with a good shredded cheddar. In my opinion, this combination tastes best and in addition, gets rid of the problem of dealing with an elastic cheese which is what mozzarella turns into when left to its own devices. I like a 60/40 blend: 60 percent mozzarella, 40 percent cheddar.
  • At this point, the dough has to rest again so that it can rise. Cover it with plastic and let it rise for about 2 hours. If the pizza will not be cooked after the 2 hours, it can wait in the refrigerator.
Zucchini and olive pizza! Use what you have on hand. I had all those vegetables in my refrigerator - no need for a trip to the grocery store. A nice touch was the fresh mozzarella on top and the sesame seeds around the border of the pizza. Actually, I hesitate to make pizza without that sesame seed border ... It's kind of my signature, I think. 

  • When ready to cook add any toppings that will be used. The oven should be preheated to 450ºF/230ºC. Place the pizza in the oven, on top of the pizza stone. Baking time will be approximately 8 minutes.
  • If the top cooks before the bottom, next time move the pizza stone to a lower shelf. If the bottom is nice and crisp before the cheese and toppings are browned, then next time the stone should be placed on a shelf that sits higher in the oven. 
  • Always check: before starting to bake the pizza make sure the oven is nice and hot. 
Ready!

  • Take the pizza out of the oven and with the use of a long knife or spatula transfer it to a cutting board. Don’t slice it yet. Inhale all the different aromas arising from it! You will smell the freshly baked dough, the melted cheese, the fragrance of roasted vegetables if any have been used. You will feel the heat rising up from the pizza, and the heat will spin all those fragrances around the room. Then look at all the lovely colours. Admire the golden dough, the redness of the sauce ... is it any wonder pizza is the world’s favourite food? Is there anyone who does not love pizza? 
  • Okay, now it’s time to stop admiring. Your pizza, she is ready to be eaten! It needed a few minutes of admiration so that its beauty could be thoroughly appreciated, but also so that the cheese could slightly set, becoming easier to slice. Well, what are you waiting for? Slice that baby and… you know what to do after it's sliced, don't you? Don't you?  

Monday, 28 January 2013

APPLE and GOAT CHEESE TART with a HONEY TOPPING


For the crust:
You will need a nine-inch tart pan.  Make your favourite crust, place it in the pan and blind bake it until it's halfway done.
For the apples:
4 apples, peeled and sliced thinly. Melt two tablespoons of unsalted butter in a large skillet and add the apples. Cook them, stirring occasionally, until the apples have softened (about ten minutes). Transfer apples to a bowl and let them cool.


For the goat cheese filling:
8 ounces goat cheese, softened
1 egg
zest from 1/2 lemon
1 teaspoon vanilla extract
1/4 cup heavy cream
2 tablespoons powdered sugar
2 teaspoons corn starch


Directions:
Place all the ingredients in the food processor and pulse until they are mixed. The mixture should come out thick, not runny.  If it's runny, add a little more corn starch.
Pour the cheese mixture onto the dough in the tart pan and then arrange the apples over the cheese.  Working in a circular pattern and starting from the edge, arrange the apples in rows. At the centre of the tart add some apple slices in a decorative pattern. Pack in the apples generously. It may seem like a lot of apples are being used, but as you know, apples shrink when they bake. If by chance there are any apple slices leftover, you guessed it, that's the cook's treat!


For the topping:

2 tablespoons butter
1 tablespoon cinnamon
2 tablespoons honey

Directions:
Cut the butter into small chunks. Mix it with the cinnamon. Sprinkle it over the apples and bake at  350º F for about 15 to 20 minutes. The tart will be done when its centre isn't runny but jiggles just slightly. When the tart comes out of the oven, heat the honey until melted, and carefully brush over the top of the tart, covering all the apple slices.  


Thursday, 24 January 2013

WHOLE WHEAT RAISIN WALNUT BREAD


A very delicious and nutritious whole wheat bread, loaded with raisins and walnuts, with a crunchy, sweet taste. The kind of bread you can't say no to. Freshly baked bread on a winter's day, what a special treat!


First off, I bought a bag of 10-grain bread mix, which is made by Bob's Red Mill and makes great bread. This brand can be found at most supermarkets and can also be ordered online. I added some whole wheat flour, some bread flour, some sunflower seeds, and some wheat germ. By the time I got through combining, I think my bowl contained pretty much every type of flour available. This was a very easy bread to make; I just had to be patient while the dough was rising. The wait was worth it!  

As a suggestion, Bob's Red Mill 10-grain bread mix can be purchased here if you are having trouble finding it at your local market. This flour contains approximately 30 grams of sugar which is a good amount to help the yeast rise. I take this sugar content into account and then I add an additional 2 tablespoons of honey whereas if there were no sugar in the Bob's Red Mill Flour Mix, I would add 4 tablespoons of honey. Below is the list of ingredients of Bob's Red Mill ten grain bread mix: 
 
ENRICHED FLOUR (WHEAT FLOUR, MALTED BARLEY FLOUR, NIACIN, IRON, THIAMINE, RIBOFLAVIN AND FOLIC ACID), WHOLE WHEAT FLOUR, ROLLED OATS, VITAL WHEAT GLUTEN, CANE SUGAR, WHOLE WHEAT FARINA, NON-FAT DRY MILK, RYE MEAL, RYE FLOUR, CORNFLOUR, OAT FLOUR, TRITICALE FLOUR, OAT CEREAL, SEA SALT, ACTIVE DRY YEAST, BROWN RICE FLOUR, MILLET FLOUR, WHITE BEAN FLOUR, CORN GRITS, MILLET GRITS, TRITICALE GRITS, BARLEY GRITS, BROWN RICE FARINA, SOY LECITHIN, OAT BRAN, FLAXSEED MEAL.

You'll notice that the mix contains triticale flour. What is it? Good question! Here is some information:
Triticale (X Triticosecale) is a hybrid grain obtained from crossing rye (Secale) and wheat (Triticum) grains. The earliest attempt to develop triticale is attributed to the Scottish scientist A.S Wilson and was not very successful. In 1898, an Australian agronomist named W. Farrer successfully produced triticale by crossing Willet Wheat with Alabama’s rye.

Here is how to make my delicious Whole Wheat Raisin Walnut Bread:

Ingredients:

1 bag (19 ounces) 10-grain bread mix (remove the yeast package that comes inside the bag)
10 ounces whole wheat flour
6 ounces bread flour
5 tablespoons sunflower seeds
4 tablespoons wheat germ
2½ tablespoons active dried yeast (use the envelope that comes with the bread mix, that’s one tablespoon, and then use more active dry yeast from your own supply)  
2 tablespoons honey
Approximately 20 ounces of warm water
8 ounces roughly chopped walnuts
6 ounces raisins
some bread flour for dusting


Directions:
  • In a large bowl mix the flours with the sunflower seeds, wheat germ and salt. Add the walnuts and raisins and mix again.
  • In a small bowl, using a spoon, mix the yeast, honey and warm water until well incorporated.   
  • Add the yeast mixture to the flour and knead by hand. When a dough has formed turn onto a surface sprinkled with bread flour and start kneading. 
  • Add a little extra water if needed to produce a soft but not too sticky dough, or add a little flour if the dough is too sticky. Continue kneading until the dough is smooth and springs back when pressed with a finger.
  • Place in a large bowl, brush the top with a little oil and cover the bowl with a clean kitchen towel.  
  • Leave in a warm place and let rise until the dough has almost doubled in size. For me, it took 4 hours. It was a very cold day, with the temperature around 20°F. The kitchen was reasonably warm, but I think the low outside temperature had an impact on the time it took for the dough to rise. 
  • Once the dough has risen, lightly dust your kneading surface with bread flour and knead again, pressing down on the bubbles created in the dough during the rising. 
  • Preheat the oven to 325°F/150°C.
  • Shape into loaves (two or three loaves, you decide), and lay on a baking sheet that has been sprinkled with a little bread flour or cornmeal. Sprinkle the loaves with some flour and score them. Cover and let rise for about an hour.
  • Place the tray on the middle shelf of the oven, spray the interior of the oven with a quick spritz of water (or place a small ovenproof dish filled with water on the lowest rack of the oven).  
  • Close the oven door and immediately raise the temperature to 350°F/180°C.
  • Bake for 30–35 minutes or until crisp and dark golden in colour. 

Saturday, 22 December 2012

SALTY KOULOURAKIA / BÂTON SALÉ / AΛΜΥΡΆ ΚΟΥΛΟΥΡΆΚΙΑ AND A BEER


These little treats are just like potato chips, in that you can't eat just one. You have to go back and get another and another. It's just a guilty pleasure. They are salty, cheesy, buttery, they melt in your mouth, and they are irresistible! The dough is a little crunchy on the outside and a lot flaky on the inside!!! 

If you are familiar with koulourakia, you know that they are a sweet buttery Greek cookie. Here is a different version of koulourakia: these babies are not sweet ... they are savoury, or as Greeks call them, they are "salty koulourakia." They are also referred to as "bâton salé," which in French means "salty sticks." I don't know why they have two names but they can be found in patisserie shops all over Greece, and they are a very popular snack.

Bâton Salé or Salty Koulourakia  ... Presenting this wonderful, addictive, savoury cookie!!!

This recipe was given to me by my aunt Sophia, who told me that she got it from the owner of a patisserie shop. It's supposed to be a top-secret recipe. (Actually, it was top-secret up until the time I published it). I don't know what methods my aunt employed to get it, and I don't want to find out, either. Suffice it to say that it's a great recipe!  

Salty koulourakia go well with drinks, especially with beer. If you want to drink that Heineken so you can forget the one you love who doesn' love you back ... go ahead, drink the beer, you're probably not in the mood for a snack. On the other hand, if a party is happening where beer will be served, make salty koulourakia, I recommend them! These guys are also good with tea. Somehow, I don't like them with coffee. 

Mix by hand, no need to use electric appliances. This recipe is incredibly easy and quick to make. To prepare it requires only one bowl, a whisk, a measuring spoon, and a measuring cup! The full recipe will yield 70 pieces but it can be cut in half. 


Ingredients:

butter: use half of a pound which is 
           equivalent to 8-ounces, or    
           2 sticks, or one cup; for the 
           metrically inclined, the butter
           equivalent is 230 grams.         
1 cup good vegetable oil 
1 cup milk
2 eggs
1 teaspoon black pepper
3 teaspoons baking powder
1/2 cup ground Pecorino Romano cheese
2 tablespoons feta cheese, finely crumbled
about 4 cups of flour
1 egg beaten with a tablespoon of milk, a few dashes of poppy seeds and a tablespoon of Pecorino Romano cheese: this will be used as egg wash
Additional toppings: sprinkle slivered almonds or sesame seeds on top of the egg wash


Directions:

Melt the butter, let it cool and then whisk it with the oil until well blended.  Add the eggs and continue whisking.
 
Add the milk, the black pepper, and the cheeses, and continue beating.

Sift the flour with the baking powder.  Add it gradually to the butter mixture, mixing between each addition. 

Turn the dough onto a board and knead, adding more flour if necessary, not so much that the dough gets tough. The dough should be soft and pliable.

Cut the dough into pieces of about 1 inch in diameter.
  
Shape into rods or circles.
Place on parchment-lined baking sheets, and brush with the egg wash mixture.

Use some toppings if desired.
  
Bake in a preheated 350º F/180º C oven until golden in colour (about 25 to
30 minutes). 

give them different shapes ...


top them with almonds, have them with tea ...
 
Pictured above is a previous version that had been baked. Notice how I had given them different shapes. Just have fun making them and shaping them! They're very enjoyable! 


Saturday, 14 August 2010

PIEROGI with various fillings: POTATO & CHEESE, CABBAGE & MUSHROOM, FETA CHEESE & SPINACH


I'm making pierogi!!! I love them, as I love any type of dumpling! It's just that I never thought I would be making them. From scratch. Buying them ready to eat has been what I've been used to. But why not try my hand at making them myself? The first step to making pierogi is to find that place in one's house called "the kitchen ..." 


I chose a pierogi dough from Martha Stewart. This dough is a thing of beauty: silky, easy to handle and delicious!  Thank you, Martha. Here's how to make it:


Pierogi Dough Ingredients:

1 large egg, lightly whisked
2 tablespoons sour cream
1 cup whole milk
1 cup water
4 and 1/2 to 5 cups all-purpose flour, some of it to be used for bench surface and for dusting 


Directions:

  1. In a medium bowl, whisk the egg. Add the sour cream, and whisk until smooth. Add the milk and 1 cup water, and whisk until combined.
  2. Slowly add about 3 cups flour, and stir with a wooden spoon to combine.
  3. Turn dough out onto a well-floured surface and work in about 1 cup flour as you knead. Use a plastic scraper to lift the dough as it will stick to the counter before any flour is worked in. Continue kneading for 8 to 10 minutes, working in another 1/2 cup flour. The dough should be elastic in texture and no longer sticky. Be careful not to add too much flour, as this will toughen the dough.
  4. Place dough in a lightly floured bowl, cover with plastic wrap and let rest while preparing a filling.
Roll out the Dough:


On a floured surface, roll out dough to about 1/8-inch thick. Make sure you are just rolling the dough and not rolling and pressing.


Using a glass or a cookie cutter measuring 2 1/2 inches in diameter, cut out as many circles as possible. Cut the circles close together, trying to save as much space as possible. Gather the dough scraps together, roll them out again, and continue cutting.


Fill the Pierogi:


  1. Lay a dry, clean towel on your work surface; set aside.
  2. Place about 1 1/2 tablespoons of filling in the centre of each dough circle.
  3. Holding a circle in your hand, fold dough over the filling, and pinch the edges, forming a well-sealed crescent; transfer to the towel. Continue this process until all dough circles are filled.


Cook the Pierogi:


  1. Fill a large pot with water and bring it to the boil. Drop the pierogi in the boiling water in batches. They will sink to the bottom of the pot and then rise to the top. Once they rise, let them cook for about a minute more.
  2. Meanwhile, in a small saucepan, cook one stick of butter over medium-high heat until nut-brown in colour, about 6 minutes. Remove the pan from the heat and drizzle the butter onto a serving platter, leaving any burned sediment behind. Remove the pierogi from the pot, and transfer to the buttered platter. By placing the pierogi on a pre-buttered platter you will prevent them from sticking. Serve immediately. You may drizzle some more butter on top.
  3. Note: Some pierogi are fried, some are sauteed in butter, some get butter drizzled over them. I don't really like fried foods, nor do I like to smother foods in butter. Drizzling a bit of butter on top is okay, but I served some pierogi coated with olive oil and they were excellent!

I chose to make three types of filling: 

POTATO AND CHEESE FILLING:
  • 3 large potatoes, cooked and mashed
  • 3/4 cup cheese, a mixture of cream cheese and cheddar
  • 3 tablespoons butter, melted
  • Salt and pepper to taste

Mix all the ingredients until well incorporated. Stuff the pierogi when the filling has cooled. 

CABBAGE, CARROT, AND MUSHROOM FILLING:


  • 2 cups shredded cabbage
  • 1 carrot, grated
  • 1 shallot, chopped and sautéed in one tablespoon of vegetable oil
  • 1/2 cup finely chopped mushrooms
  • 1 clove garlic, chopped
  • 1/2 teaspoon chopped fresh ginger
  • 2 tablespoons vegetable oil
  • salt and pepper to taste
Cook the cabbage and carrot in boiling water until nice and soft. Drain very well and reserve. Sauté the shallot, garlic, ginger and mushrooms in the vegetable oil until they are soft. Add the cabbage mixture and season with salt and pepper. Let cool before filling the pierogi.

Pierogi with Feta cheese and Spinach Filling:


Being of Greek heritage, I love the combination of feta cheese and spinach.  This recipe combines feta, spinach and pierogi dough to make a hybrid Greek-Polish dumpling. One of the best things about it is that it contains no butter! The pierogi are topped with just a bit of olive oil and Parmesan cheese before they are served. Here is the recipe for this filling:

Ingredients:
  • 1 box of chopped frozen spinach
  • 1/2 cup feta cheese, crumbled
  • 2 tablespoons grated Parmesan cheese
  • 1 egg, well beaten
  • 2 shallots, chopped
  • 3 tablespoons parsley, chopped
  • 1 tablespoon mint, chopped
  • 1 tablespoon dill, chopped
  • 2 tablespoons vegetable oil
  • some olive oil and Parmesan cheese for topping
  • salt and pepper to taste
Thaw and chop the spinach into small pieces. Even though it's already chopped you will need to chop it into smaller pieces. Cook it in a bit of boiling salted water until it is soft. Drain it very well. In a medium skillet heat the vegetable oil and add the shallots. Sauté until the shallots are soft. Add the parsley, spinach and mint, and mix well. Cook for about 2 minutes. Remove from the heat and add the cheeses and egg. Mix well and season with salt and pepper. Let cool before using as stuffing. When the pierogi are cooked, serve topped with some olive oil and Parmesan cheese.